After selecting and connecting the optimal Message delivery option for sending messages, you need to define the parameters for sending them in the Settings → Other → SMS delivery settings → Message templates section.
You can view all SMS messages sent to a patient in the passport section of the selected patient's card or in the Settings → Other → SMS delivery settings → Sent Messages section.
We recommend starting to set up SMS messaging in the following order:
You can set up reminders for scheduled visits in the Settings → Other → SMS delivery settings → Message templates → Appointments tab.
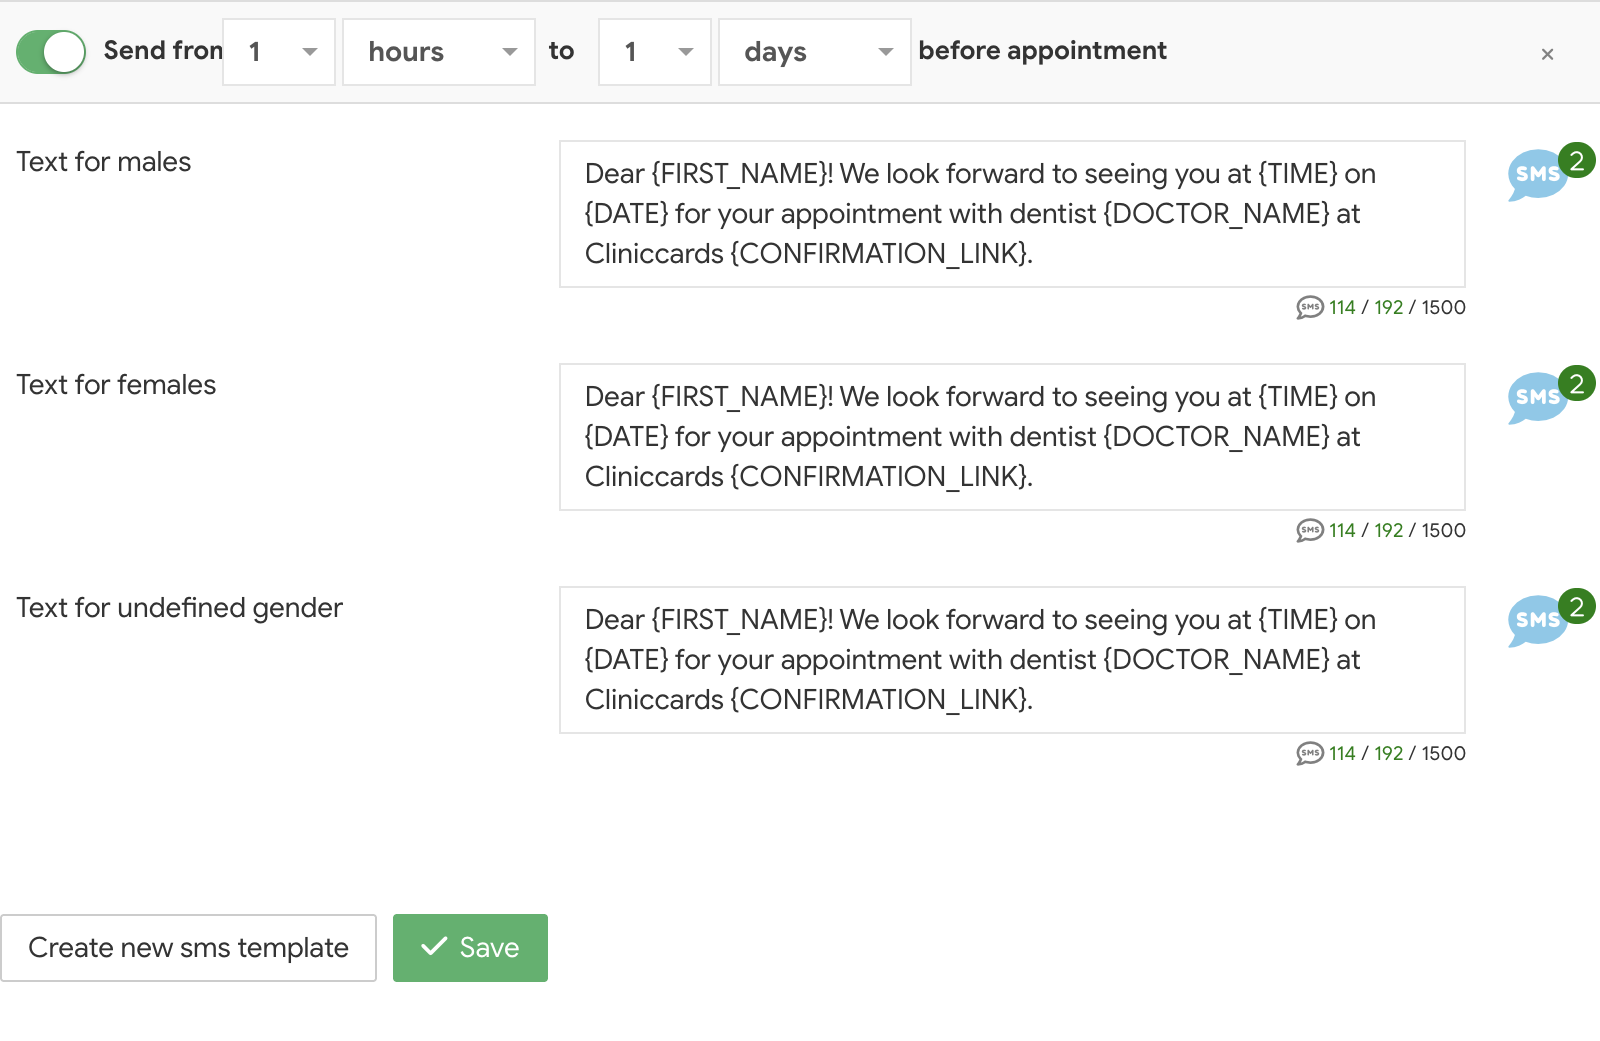
The Appointments tab contains the following settings for SMS reminders about scheduled visits:
Individual communication with patients increases the effectiveness of the mailing. We recommend personalizing such messages as much as possible using macros located at the bottom of the message text input field. With macros, you can automatically add personal data from the Cliniccards patient card to the message template:
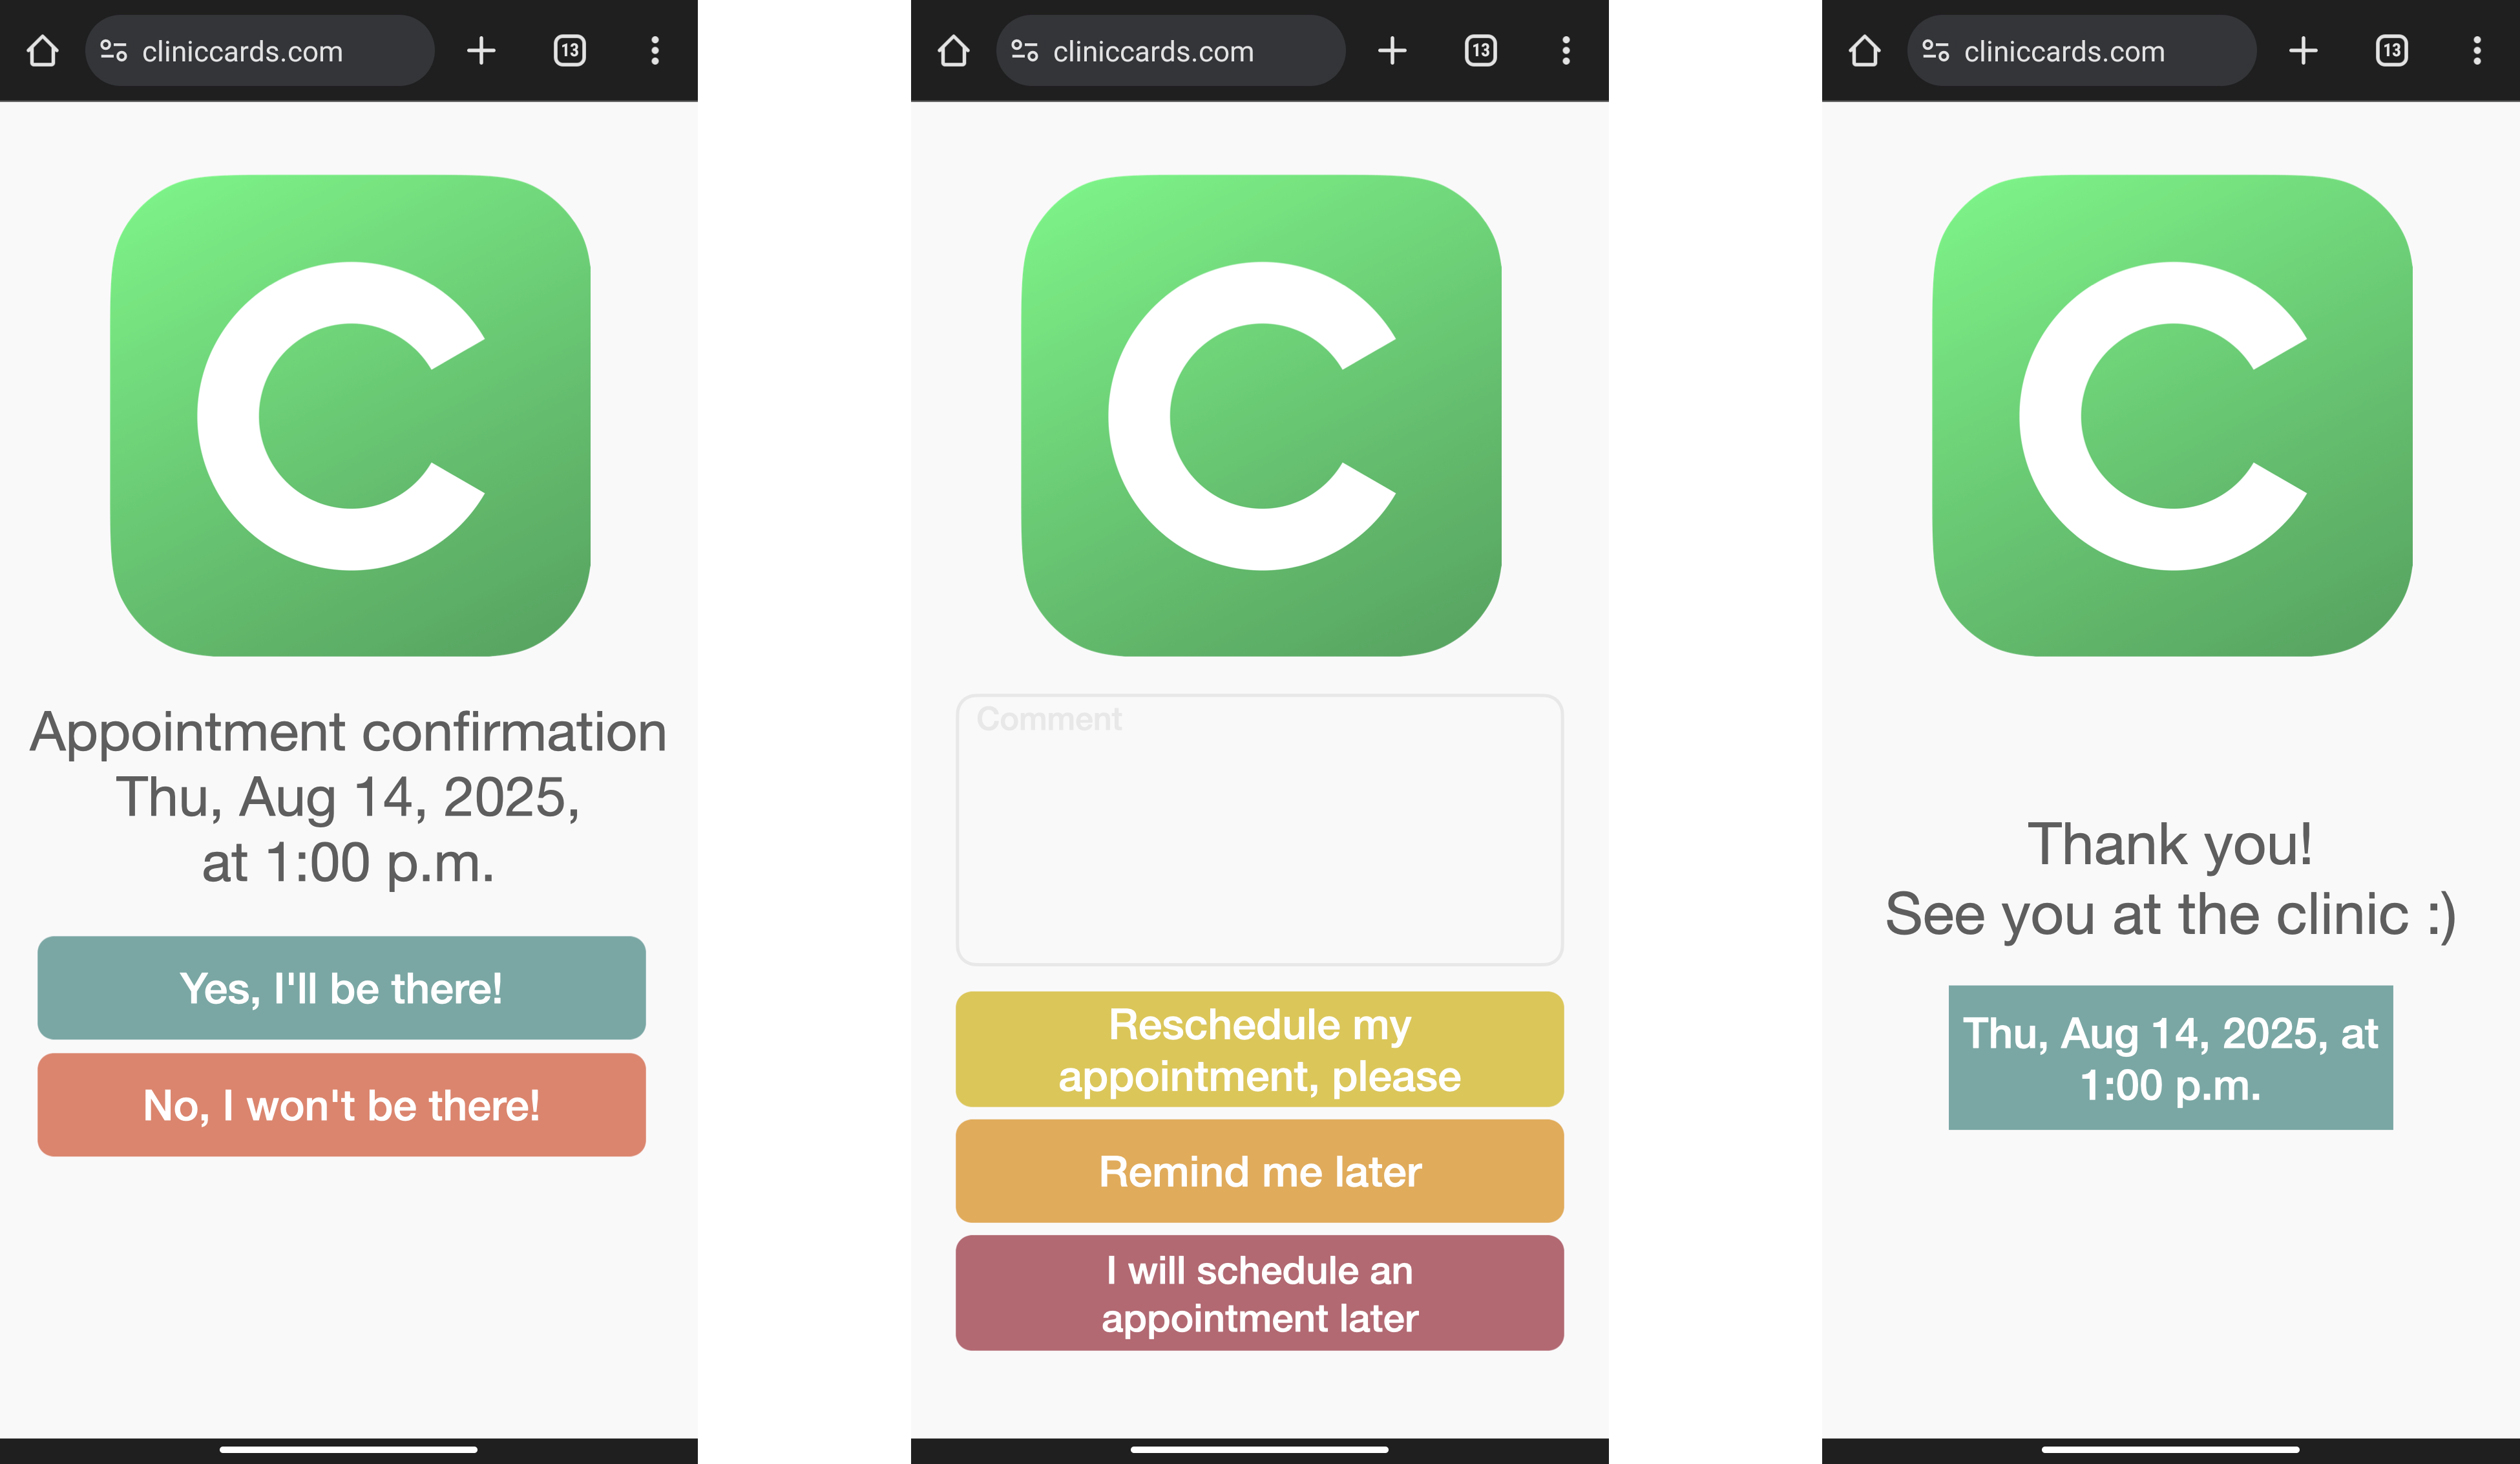
The Appointment confirmation feature allows you to automate the process of confirming or canceling an appointment by a patient, which will significantly reduce the workload on clinic administrators, and the patient will be able to confirm/cancel an appointment from their own phone with a single action.
To activate the Appointment confirmation menu, you need to connect one of the Message delivery options and add a link to confirm the appointment to the text of the reminder about the upcoming appointment. To add a confirmation link, click on the SMS text field, after which the SMS configuration macros will appear at the bottom of the field. Select Confirmation link and add this macro to the SMS text. Please note that the confirmation link is only added to SMS reminders about visits and to SMS messages sent immediately after booking.
When the patient clicks on the link, they can confirm, cancel, or reschedule their visit. Depending on the patient's response, the status of their visit in the schedule is automatically changed to the status they specified in the feedback form.
Automatic notifications sent after a specified period of time following the provision of certain services allow you to remind patients about the need for a follow-up visit. Such reminders allow you to create an additional service for patients and increase the clinic's workload.
This option can also be used to send messages with recommendations immediately after the procedure, ask for an assessment of the quality of services at the clinic, or remind patients about professional examinations by selecting a longer interval for sending SMS messages.
To configure such a mailing, go to the Settings → Other → SMS delivery settings → Message templates → Procedures tab.

Next, select the services from the clinic's price list after which messages should be sent to patients. To do this, click on the Plus sign next to the required service. In the window, set the sending interval and write the content of the SMS. Save the changes.
In Cliniccards, you can use automatic SMS greetings to birthday boys and girls with personal offers, discounts, and promotions that can be added to the text of the message. As practice shows, such messages have a higher conversion rate of patient response compared to mass mailings. And a personalized, memorable greeting increases the loyalty of your clinic's patients.
In addition, you can use the Patient birthdays report to view birthday patients from the clinic's database. Thanks to this report, you don't have to create reminders and separate notes in your calendar to congratulate patients on their birthday.
With automated messaging to your patient database, you can draw attention to specific products and services or inform your clinic's clients about special offers. To set up mass messaging to your patient database, go to Reports → Clinic patients and follow these steps:
1. Select the target audience.
The system's functionality allows you to send SMS messages to specific groups of patients based on their needs or preferences. As practice shows, such targeted mailings are very effective. Using the filter in the first line of the report, set the parameters to more accurately define the target audience for the mailing.
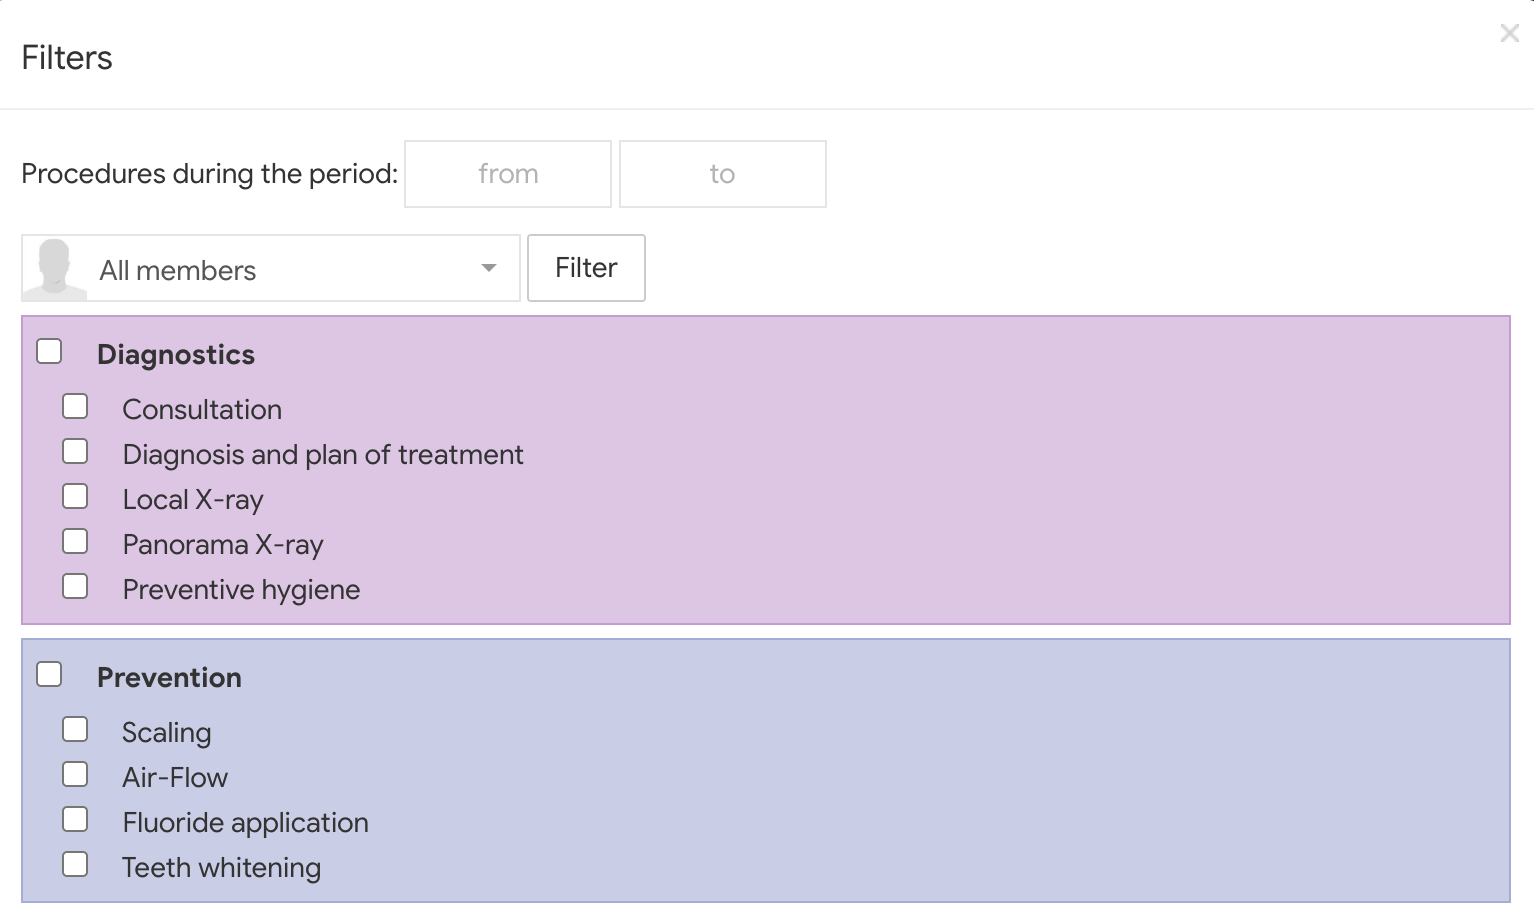
You can also use the Filter button in the Clinic patients report (the button is located in the upper right corner of the page) to sort patients who have had certain items from the price list performed during the selected period.
2. Make sure you have enough funds in your account to send messages. You can do this in your personal account on the TurboSMS website.
3. Start the mailing.
To send an SMS to the selected target audience, click the Send SMS to patients button at the bottom of the Clinic patients report page. After clicking this button, write the text of the message for patients in the window and click the Send SMS button. Use the macros below the text input field. They will allow you to add personal data from the recipient's card to each SMS sent.