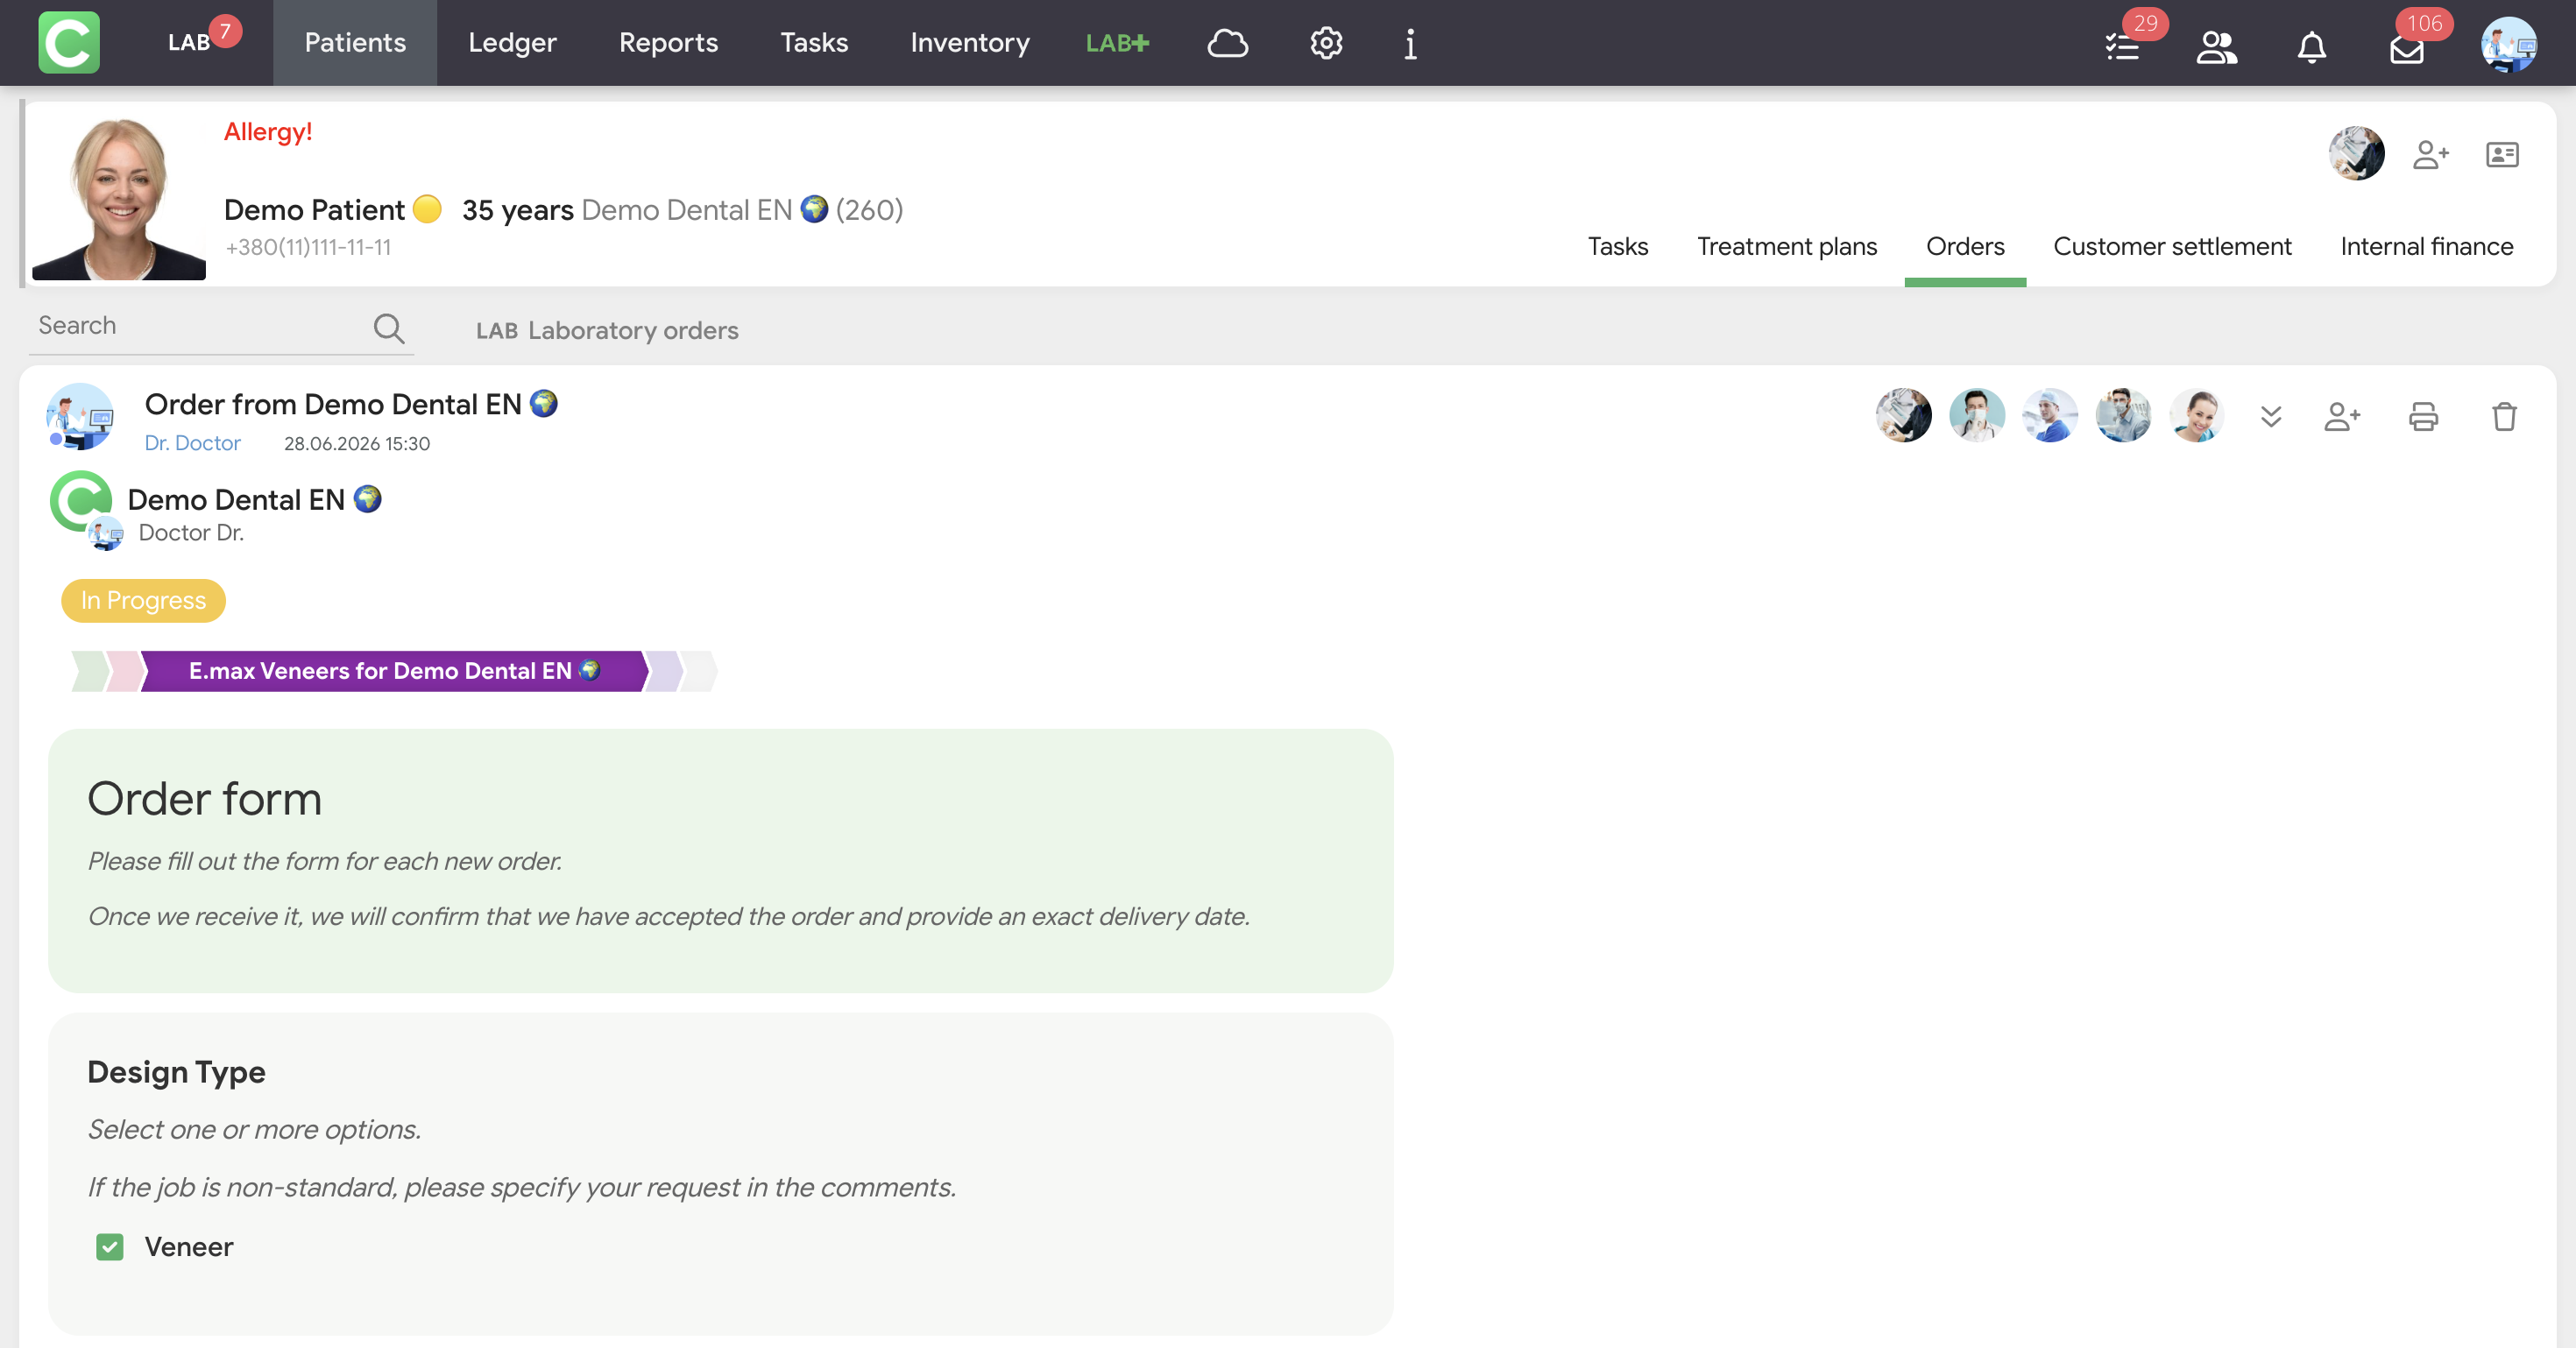
An order can reach the lab in three ways: from the requesting clinic via Cliniccards, by creating it manually in the top panel, or from the patient’s card.
Method 1. Order from a Cliniccards clinic
When a facility creates an order for your lab, several things happen simultaneously:

You can open an order in three ways:
Method 2. Creating an order manually using the Lab+ button
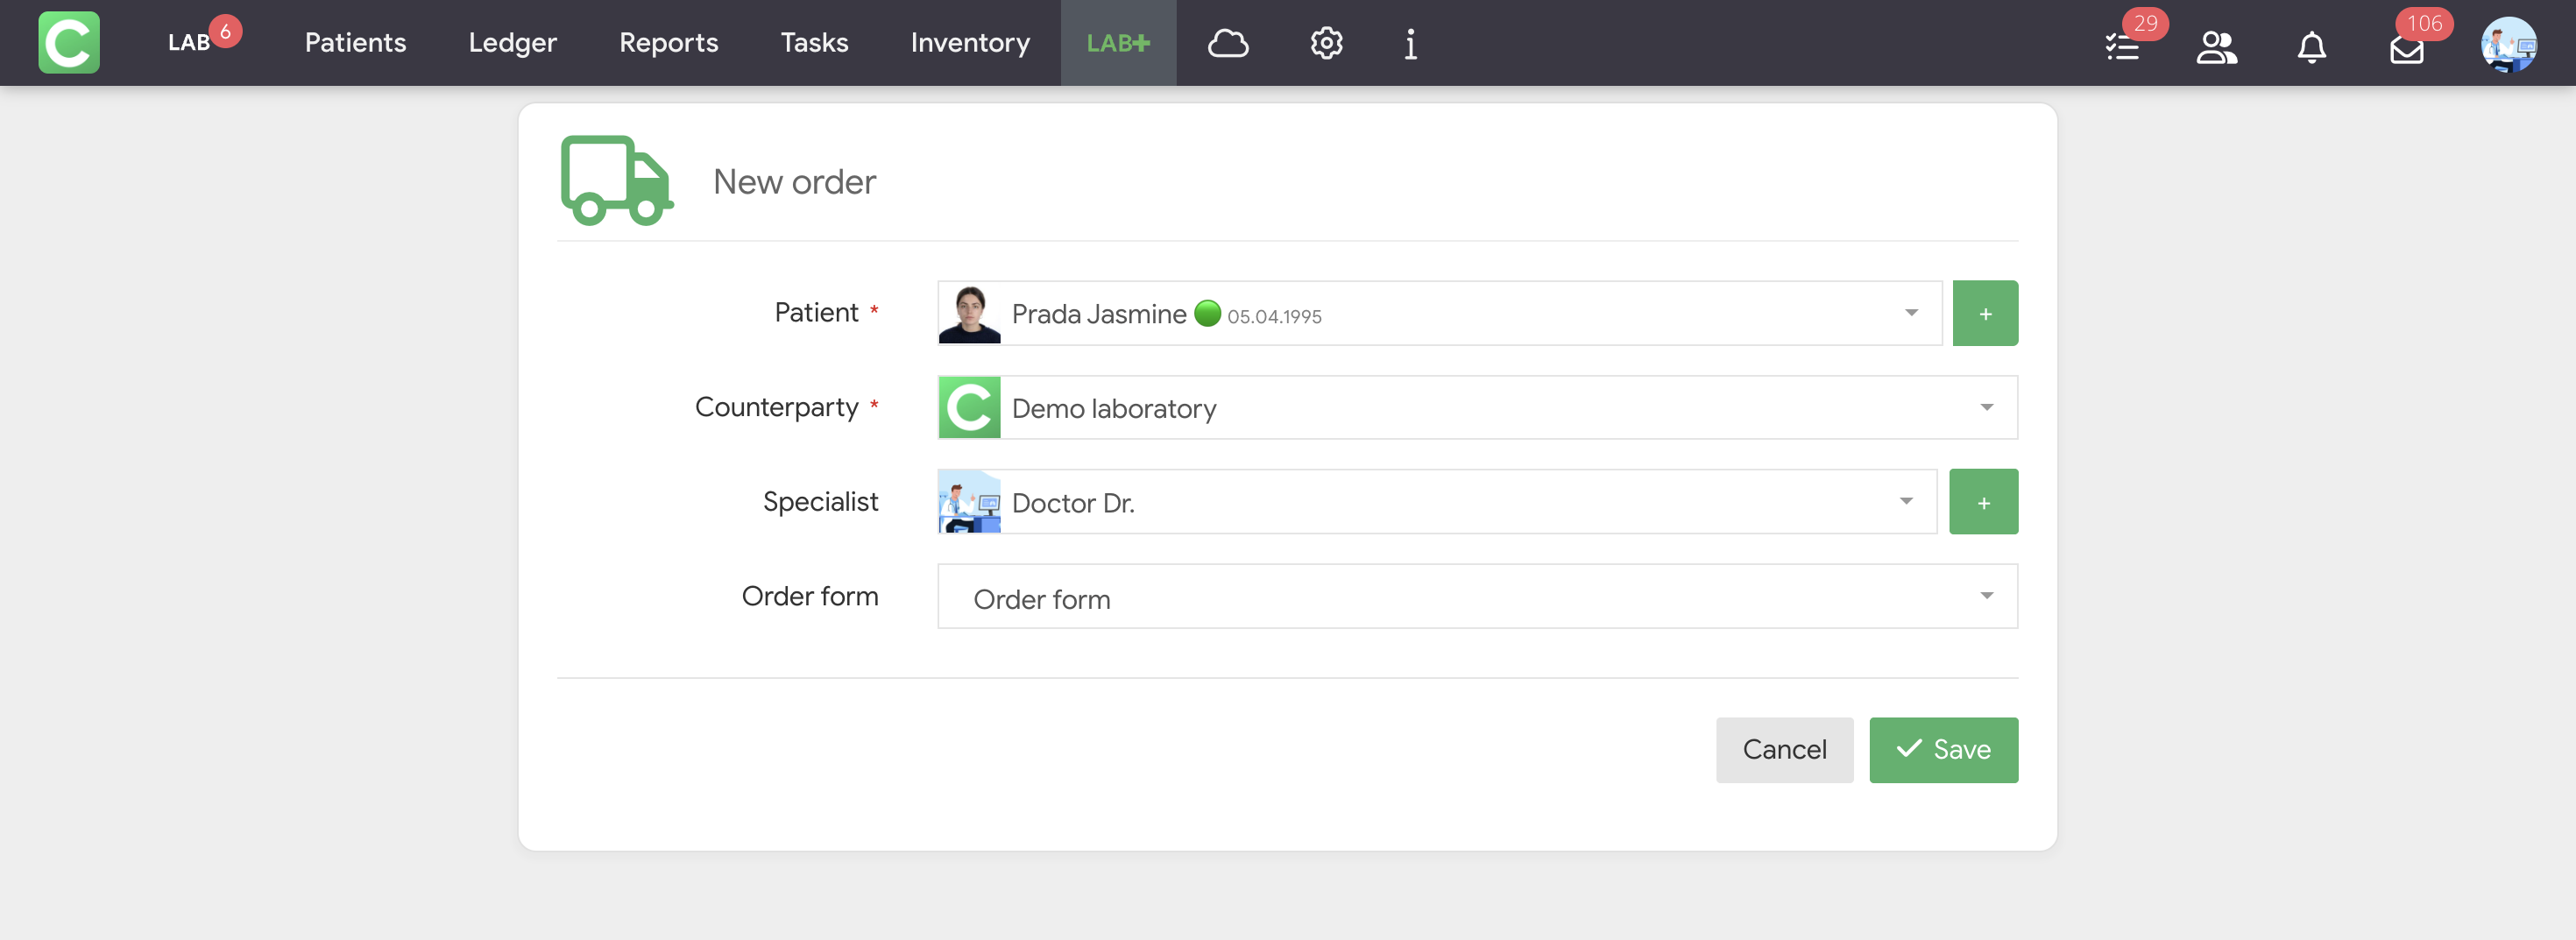
If the requesting clinic does not use Cliniccards or, for some reason, submitted the order outside the system, the lab can create the order itself using the special Lab+ button in the top panel.
How it works:
 button next to it. button next to it.
After saving, the order appears in the general workflow of the Orders (LAB) module, and further work with it is no different from orders received from Cliniccards clinics.
Method 3. Creating an order from a patient card
In addition to the Lab+ button in the top panel, you can create an order directly in the Orders section of a patient’s record using the blue LAB button, located next to the  button used to create a new stage.
How it works:
When a referring clinic creates an order for your lab, several things happen at once:
You can open a request in two ways:
Actions on the order
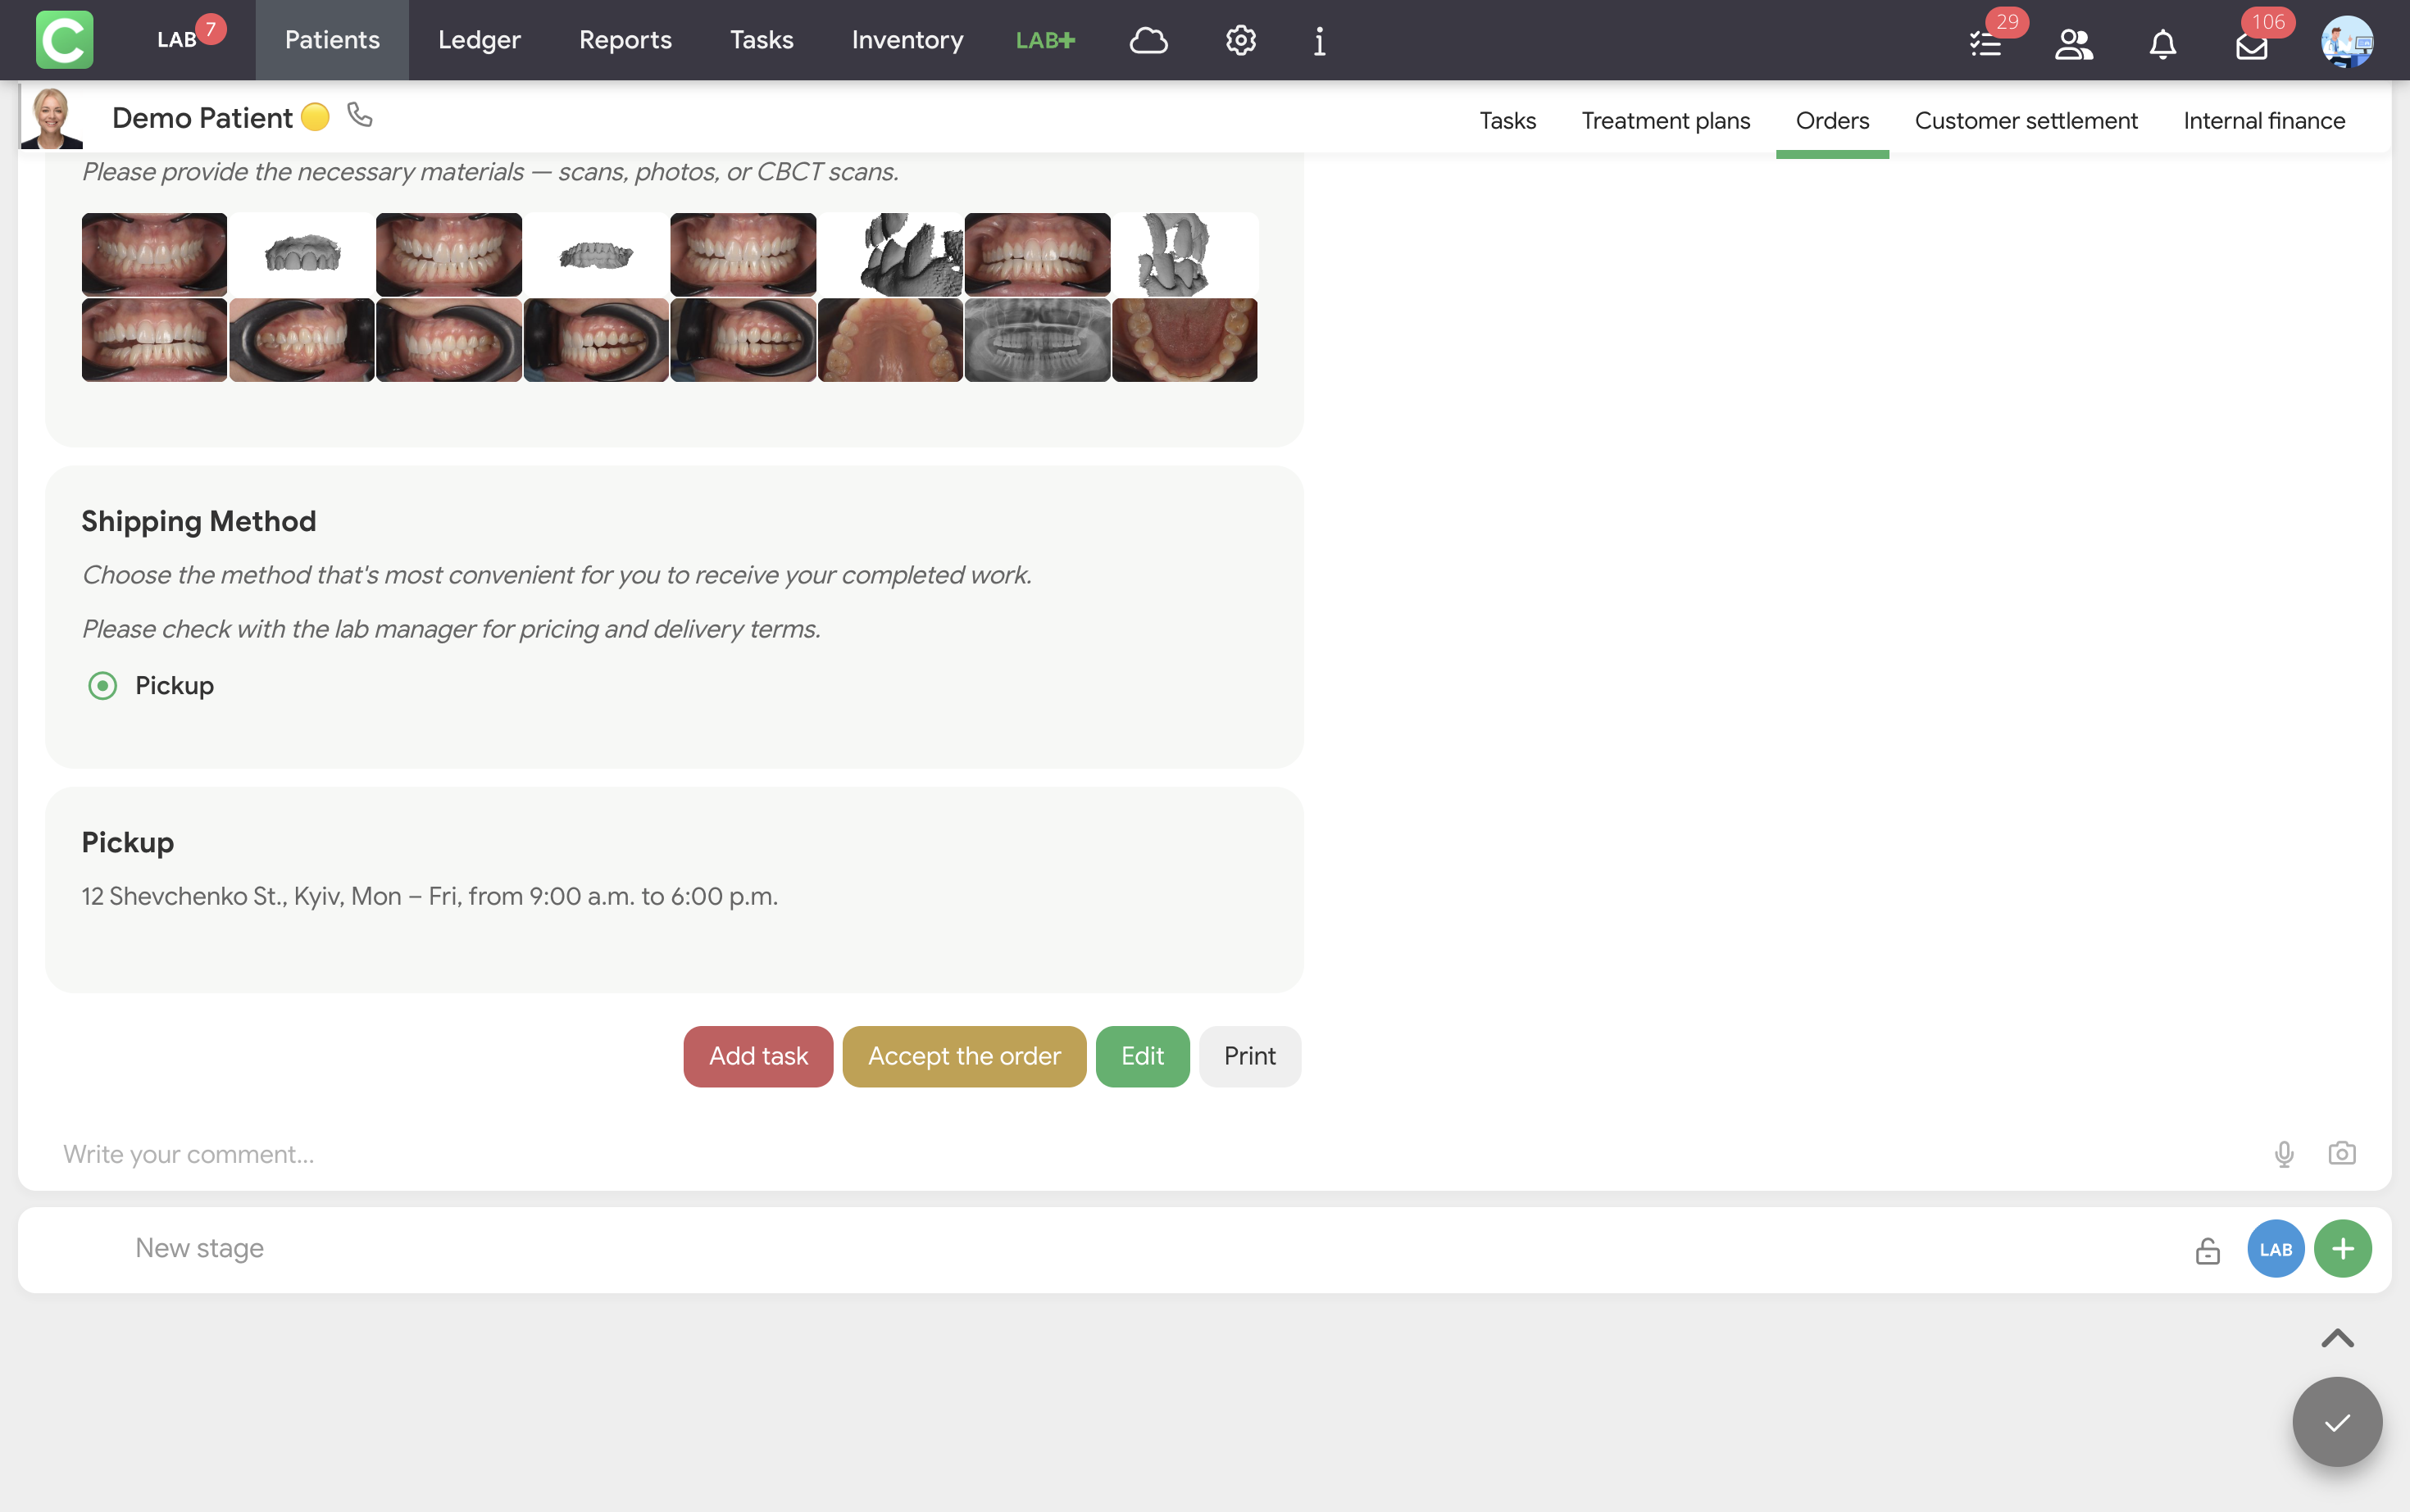
At the bottom of each order, the following buttons are available, corresponding to these actions:
Accepting the order is an intermediate action. It merely records that the order has been accepted but does not yet specify who will fulfill it. Further work proceeds through the creation of a task.
Below these buttons is the Write your comment field, which allows you to attach a voice message or a photo. Comments are visible to both you and the clinic.
Creating a task from an order
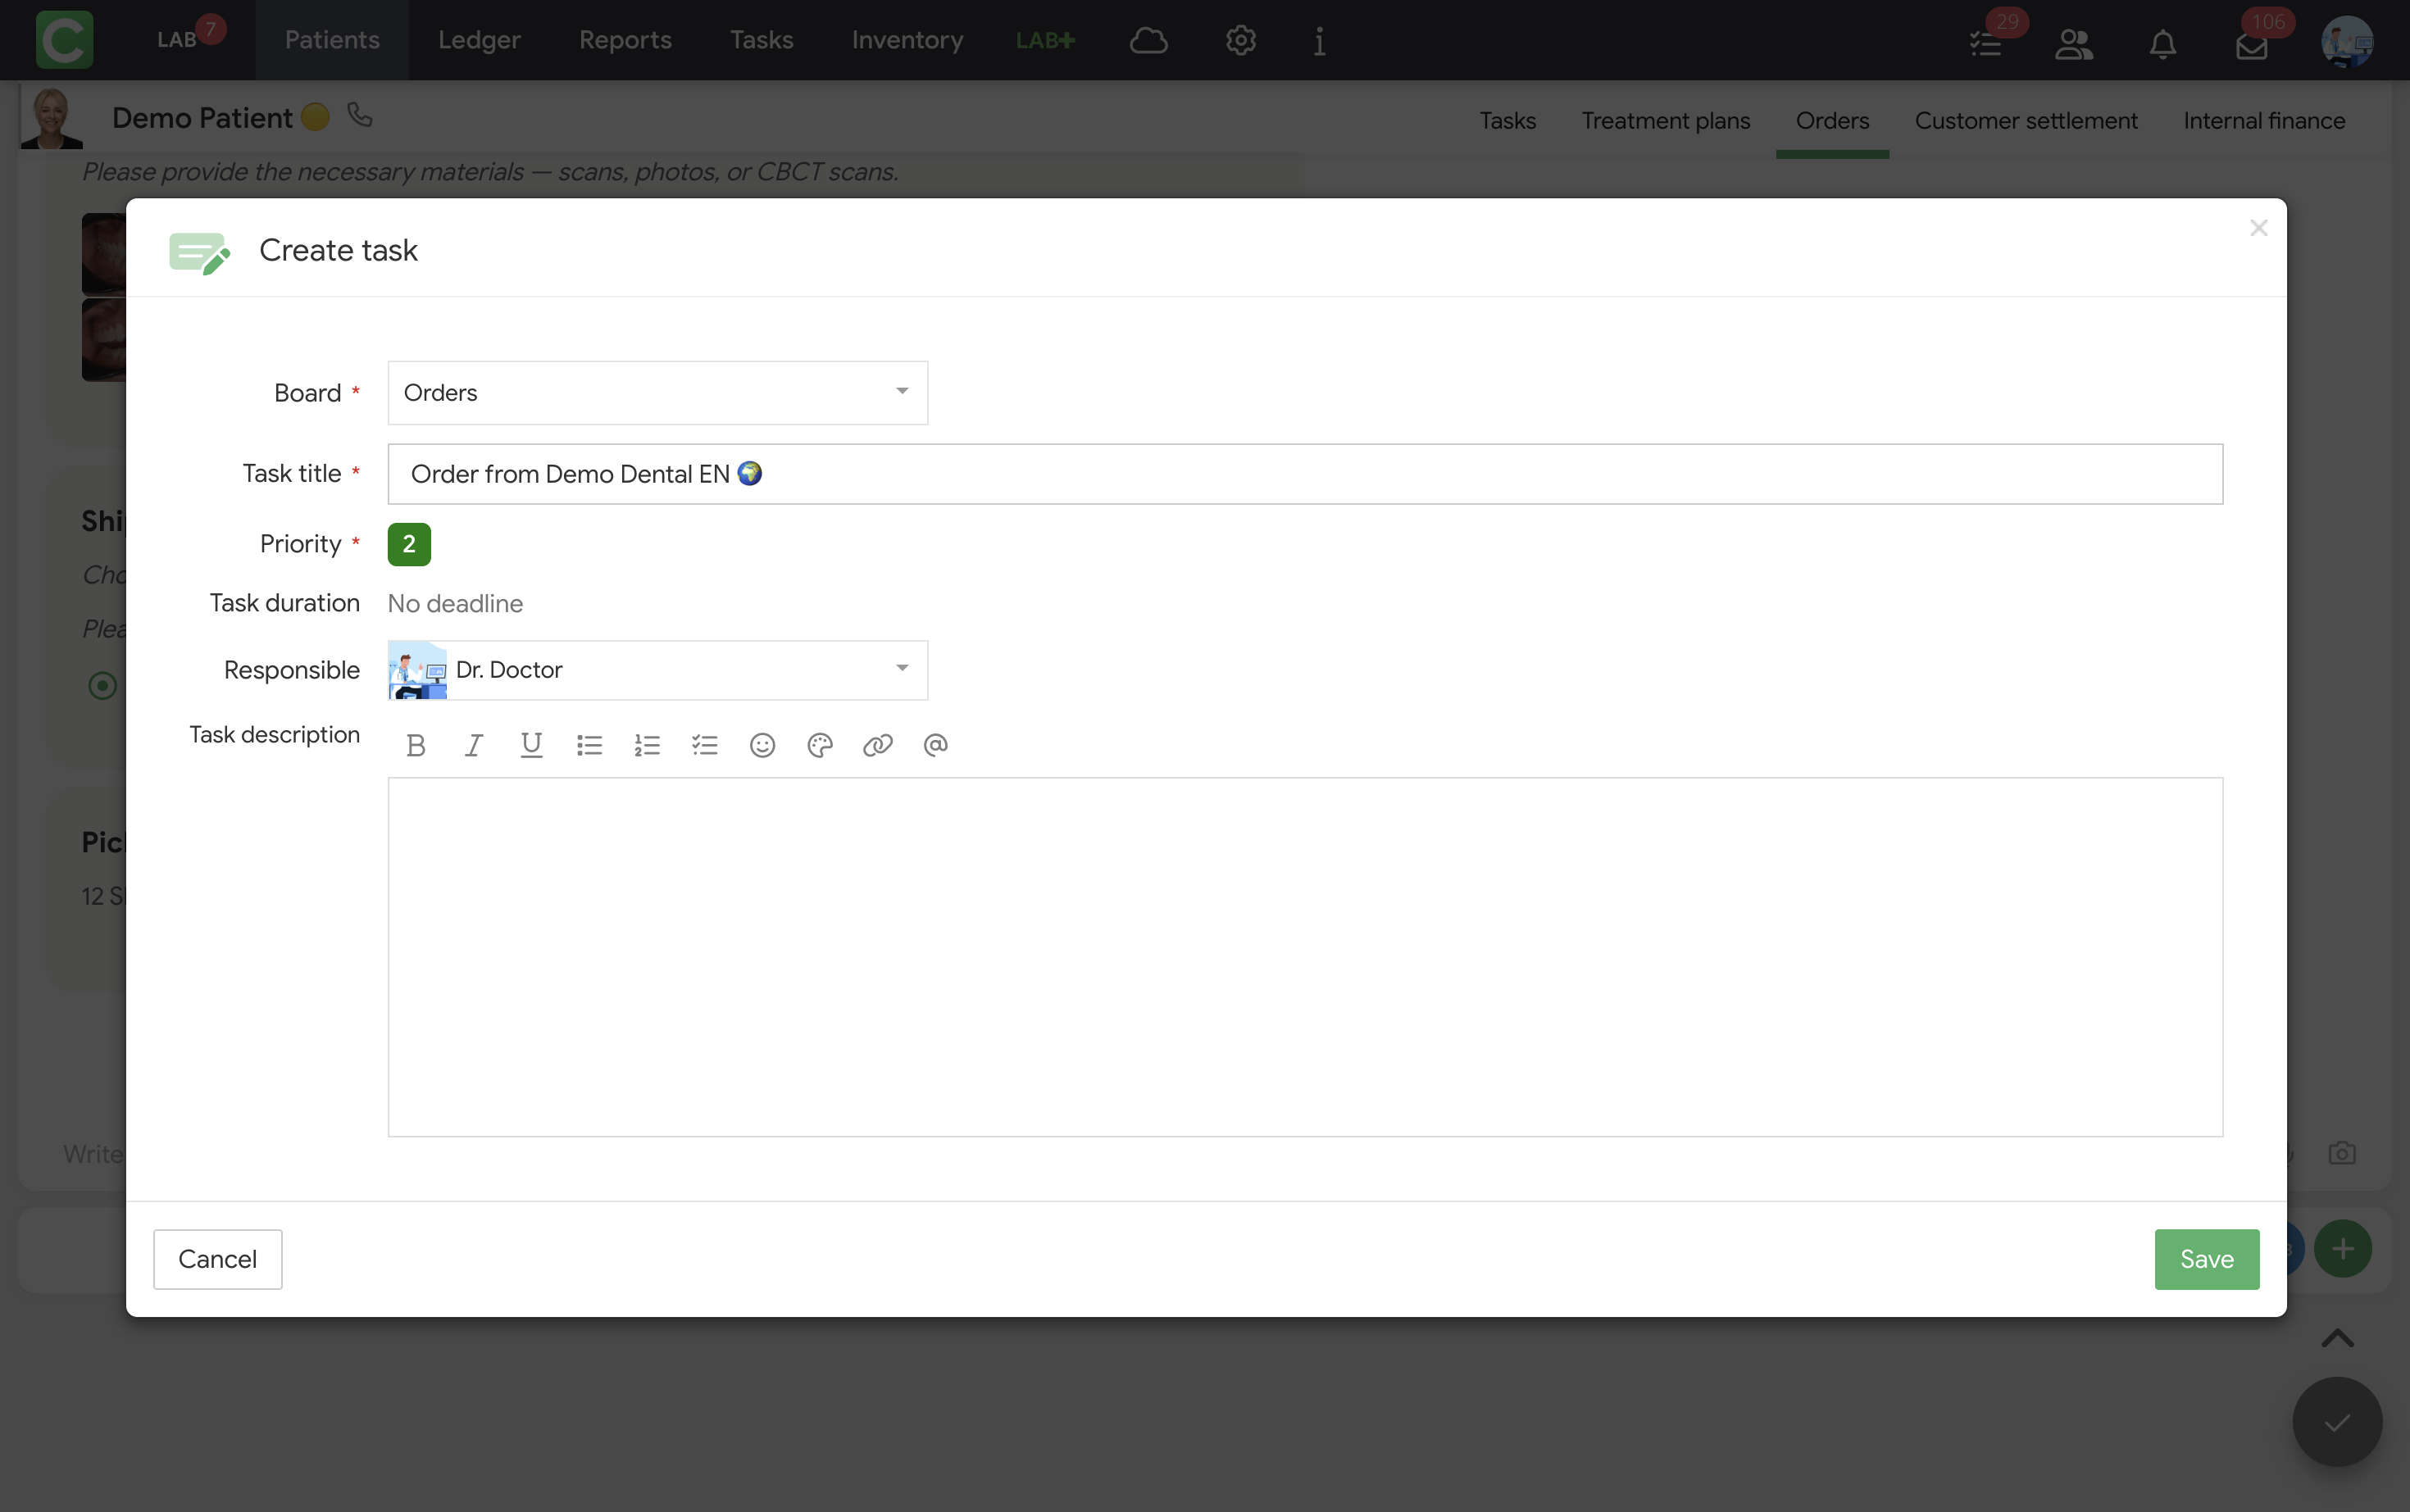
By clicking Add task, you open the Create task window:
By default, each laboratory has one board named Orders with the following statuses: New → In progress → Completed → Awaiting payment → Closed. If needed, you can create new boards and statuses. You can learn more about this in the Manual section under Tasks.
The task appears on the selected board. You can move it between statuses, comment on it, and attach files. To learn more about working with Tasks, see the Manual section Tasks.
Changing a task’s status
Above the task is a colored status bar. This bar displays all assigned statuses from all categories – both system and user-defined.
To change or add a status:
All assigned statuses are visible to the requesting clinic in the patient’s record within the corresponding order. This means the laboratory can accurately notify the clinic simultaneously about the processing stage, type of work, and priority – without additional messages.
Custom status settings are available in the Settings → Other → Order statuses section.
Task status toggle
Once a task is added to an order, a separate status toggle appears above the order – a colored bar showing the stages of completion. The current status is highlighted, while the others are dimmed and hidden.
The statuses correspond to the statuses of the board on which the task is placed. If you have statuses configured on your board (for example, New → Modeling → Casting → Glazing → Done), those are the statuses displayed above the order. The specific set of statuses depends entirely on how the particular board is configured in the Tasks module. You can learn more about this in the Manual section Tasks.
The status toggle shows the order’s progress in real time. Both your team and the client clinic can see this. This means the clinic can go to their patient’s record, open this order, and see what stage you’re at – without any additional phone calls.
In addition to the status toggle, just above the order, the clinic also sees the task completion percentage – how far along the work is within the current stage. This provides an extra level of transparency: the clinic sees not only which stage you’re in but also how close you are to completing that stage.